Measuring Tape: Anatomy, Marking, and Steps to Measure
Anatomy of a Measuring Tape
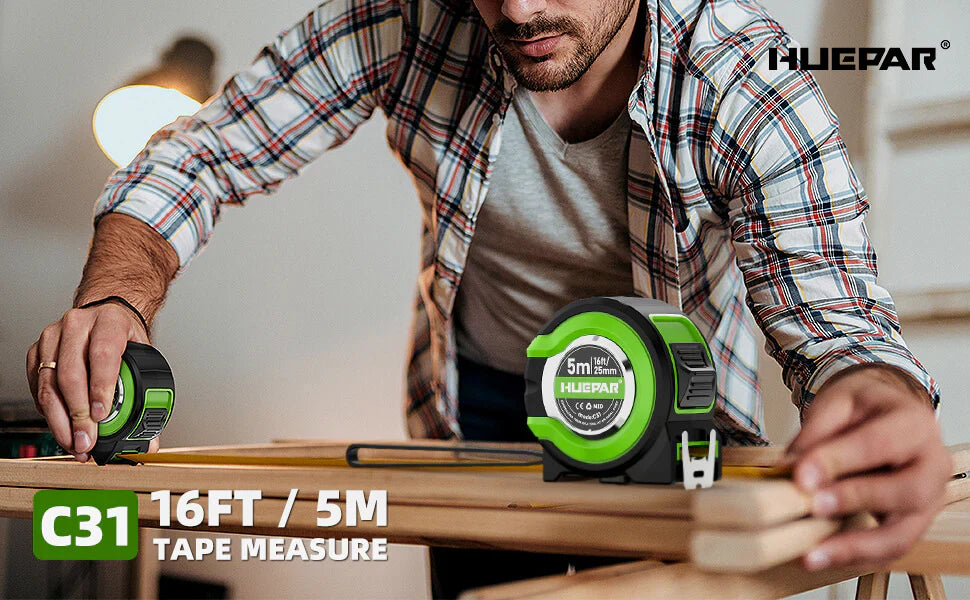
A measuring tape is a simple yet ingenious tool, with each component playing a crucial role in ensuring accurate measurements. At its core, it comprises a case that houses the retractable blade or tape, made of materials like fiberglass, cloth, or metal for durability and flexibility.

The case length varies depending on the tape's intended use, with shorter versions for household tasks and longer ones for construction or industrial applications. A thumb lock mechanism allows you to securely hold the blade in place after extending it to the desired length.
The blade or tape itself is the star of the show, featuring precise markings that enable precise measurements. At one end, a sturdy hook protrudes, designed to catch the edge of the surface being measured. This hook often has a slot that allows for inside measurements, such as the depth of a cabinet or window frame.
For added convenience, many measuring tapes include a belt clip, allowing you to keep the tool within reach while working on projects that require frequent measurements.
Markings on a Measuring Tape
Measuring tapes come with a variety of markings to ensure accurate measurements in both imperial (inches) and metric (centimeters/meters) units. These markings are typically printed on the tape's blade or ribbon.
Division Markings in Centimeters
The metric measurements on a measuring tape are represented by division markings in centimeters. Each centimeter is clearly marked with a longer line, and smaller subdivisions are indicated by shorter lines. The centimeter markings are usually found on the lower portion of the tape.
Division Markings in Inches
The imperial readings on tape are in divisions of inches. Each of these has greater mark on it, while lesser divisions like 1/2 inch, 1/4 inch, 1/8 inch, or even 1/16 inch have lesser mark on it. Inch readings have space of their own on tape, typically on upper part of tape.
Top Part (Fractional Inches)
Most of upper part of tape has readings in fractions of inches on it. They work perfectly for precise readings in measures of empires, more so if dealing with tiny figures or intricate workpieces.
Bottom Part (Centimeters/Millimeters/Meters)
Bottom part of tape has metric readings like centimeters or millimeters or even meters on it. It proves to be helpful in work requiring metric readings or working in countries that make use of metric measures.

How to Measure with a Measuring Tape?
Taking readings accurately plays vital part in many industries ranging from building to carpentry to sewing to designing spaces in houses or commercial property. Measuring tape is easy to handle but plays vital part in giving precise readings. Follow these steps to take readings on tape:
-
Set the 0 Mark at One End: Ensure that before measurement, tape mark of 0 is set at measurement start point to work from. This step of importance makes easy to work from for all further readings to take their readings from it as their point of reference.
-
Extend the Tape to the Opposite End: Holding tape firmly at measurement start point, take tape or its edge to other endpoint where measurement is to take readings from. Be extra careful not to twist or fold tape since it may distort measurement readings taken from it.
-
Read the Centimeter Markings: Most measurement tape have face of their blade with centimeter graduations. Find endpoint of reaching to that full mark of a centimeter, and write that mark. Measuring in centimeters.
-
Read the Inch Markings: Aside from having their face with centimeter graduations on it, measurement tape have their face with inch graduations on it as well. Uppermost set of lines have measurement in inches while every inch further sub-divided in fractions like 1/8, 1/4, or 1/2. Find endpoint of reaching to that full mark of that inch and follow by that by reading off from that fraction lines to determine measurement in exactly in inches.
With these steps, you'll have measured accurately lengths by measurement tape in whichever measurement unit in which to work in, in centimeters or in inches. Hold tape firmly stretched level to object for maximum accuracy.

Examples of Measuring
Measuring Tapes have many practical examples of their measurement of objects or of varying objects' surfaces. Few of these practical examples include:
- Measuring room length: Unroll tape measurement from room edge to room edge while having tape stretched level to floor level. Read off measurement on far tape end to determine room length.
- Measuring door frame height: Hold tape measurement upright on door frame while unrolling to reach to upper edge of frame level. Read off to determine height.
- Measuring circumference of tree trunk: Wrap around trunk of tree at breast level while flat level on top of it level. Read off where tape edge intersects tapehook to determine circumference.
- Measuring the furniture size: Hold tape measurement on furniture size that you need to take measurement of, for instance, table breadth or sofa length or table breadth or other similar furniture size. Read at tape measurement end.
- Measuring from point to point space: Hold tape measurement at one point stretching to other point but not stretching at all but at stretching point only hold tape measurement. Read to get to know space measurement from point to point space measurement.
- Measuring curtain rod size: Hold tape measurement across where you need to insert curtain rod while tape measurement is level or even. Read to get to know how much curtain rod size to have.
Always double-check to get to know measurement while having tape measurement properly stretched and in alignment for getting precise measurement results.
Benefits of Using a Measuring Tape
Measuring tapes have several advantages that make so much of a tool so indispensable to so many professionals. One of their greatest advantages is that they are so versatile in their application. They are elastic tools that have measurement of straight lines or curvatures or even extend in to hard-to-reach points so that they accommodate all kind of work ranging from carpenter work to work on houses to sewing to repairing things in around-the-house repairs.
One of their greatest advantages is that they are so precise in their measurement. Quality tape measures have graduated measurement so precise that you get consistent results that work every time. Precision is so much required in situations where even tiny discrepancies would cost dearly or yield subnormal results.
One of their greatest advantages is that they are so easy to carry around. They are not like bulky measurement tools that take space in toolboxes or on workbenches but fit in to tool or in to a pocket so that you carry around in ease wherever work requires their on-the-fly application on-the-fly.
Resilience is yet another appreciative advantage of measuring tapes. Most of them have rugged materials like fiberglass, stainless steel or reinforced plastic that is capable of enduring daily use and rough conditions. Resilience translates to working lifetime so that not much replacement has to be put in frequent intervals but for so much of a time-span it offers good measurement solution that has served us so much for so many years now.
How to Choose a Right Measuring Tape?
When selecting a tape measure, it is necessary to consider several aspects in order to determine that you have the proper tool for your project. Material, case length, style of hook, and blade width are all aspects that may affect how durable the tape is, how accurately it measures, and how easy to handle it is.
Materials:
Measuring tape measures vary in materials that have their own set of benefits alongside limitations. Fiberglass tape measures have difficulty stretching but are durable for work in the field or in construction work. Cotton tape measures have more give to them and won't mark materials as much so work for woodwork or work in indoor spaces. Plastic tape measures are of light weight and low cost while metal tape measures like ones that are constructed of stainless steel are very hard to damage and resistant to corrosion.
Case Length:
Case length is how much tape that is in tape measure in retracted status. Longer cases of around 25 feet to 100 feet work for larger-scale work like building or work in survey work while cases of around 12 feet or 16 feet work for more general work like work in woodwork or work in home improvement work.
Hook Type:
Hook of tape measure is used to catch on objects so that you get precise measurement readings. There are tape measures that have rigid metal hooks while other have more pliable wire or nylon-covered hooks. Depending on how hard or rough of materials that you'll work on, consider getting tape that has secure hold but won't mark materials up.
The blade or tape measurement ranges from 1/2 inch to more than 1 inch in size. Wider blades provide more visibility and ease of readings but might not fit in constricted spaces. Narrower ones fit in constricted spaces but might not provide easy-to-read readings accurately enough.
Considering these aspects in mind, you might consider tape that has all that you need to make accurate readings while having a tool that would endure project requirements.
