


How Do Laser Levels Work?
What are Laser Levels?
Laser levels are compact, versatile units that project lasers in the forms of a dot, line, or cross to give the reference for the level or plum. Unlike spirit levels, these laser levels will self-level, in that they automatically compensate for slight surface irregularities or slight misalignment.

How Does A Laser Level Work?
The central part of every laser level is the laser diode, which hangs on a pendulum mechanism. It equips this pendulum system with the ability to keep the diode level, hence projecting a perfectly horizontal or vertical laser line while the tool itself is not perfectly level within the range-usually 4 to 6 degrees. The self-leveling feature makes laser levels really handy for a broad spectrum of works that range from simple tasks like hanging pictures and cabinets to laying tiles, aligning windows and doors, and even bigger construction jobs.
Types of Laser Levels
There are several types of laser levels available, each designed for specific tasks and applications:
Dot/Point Laser Levels
These are the simplest and project two, three or five laser dots depending on the model. Applications of these models commonly include positioning a series of recessed lights in a ceiling, checking walls for plumb and aligning objects. The dots give both vertical and horizontal references. One popular model is the green three-dot laser from Huepar displaying highly visible plumb dots up and down with a horizontal dot.
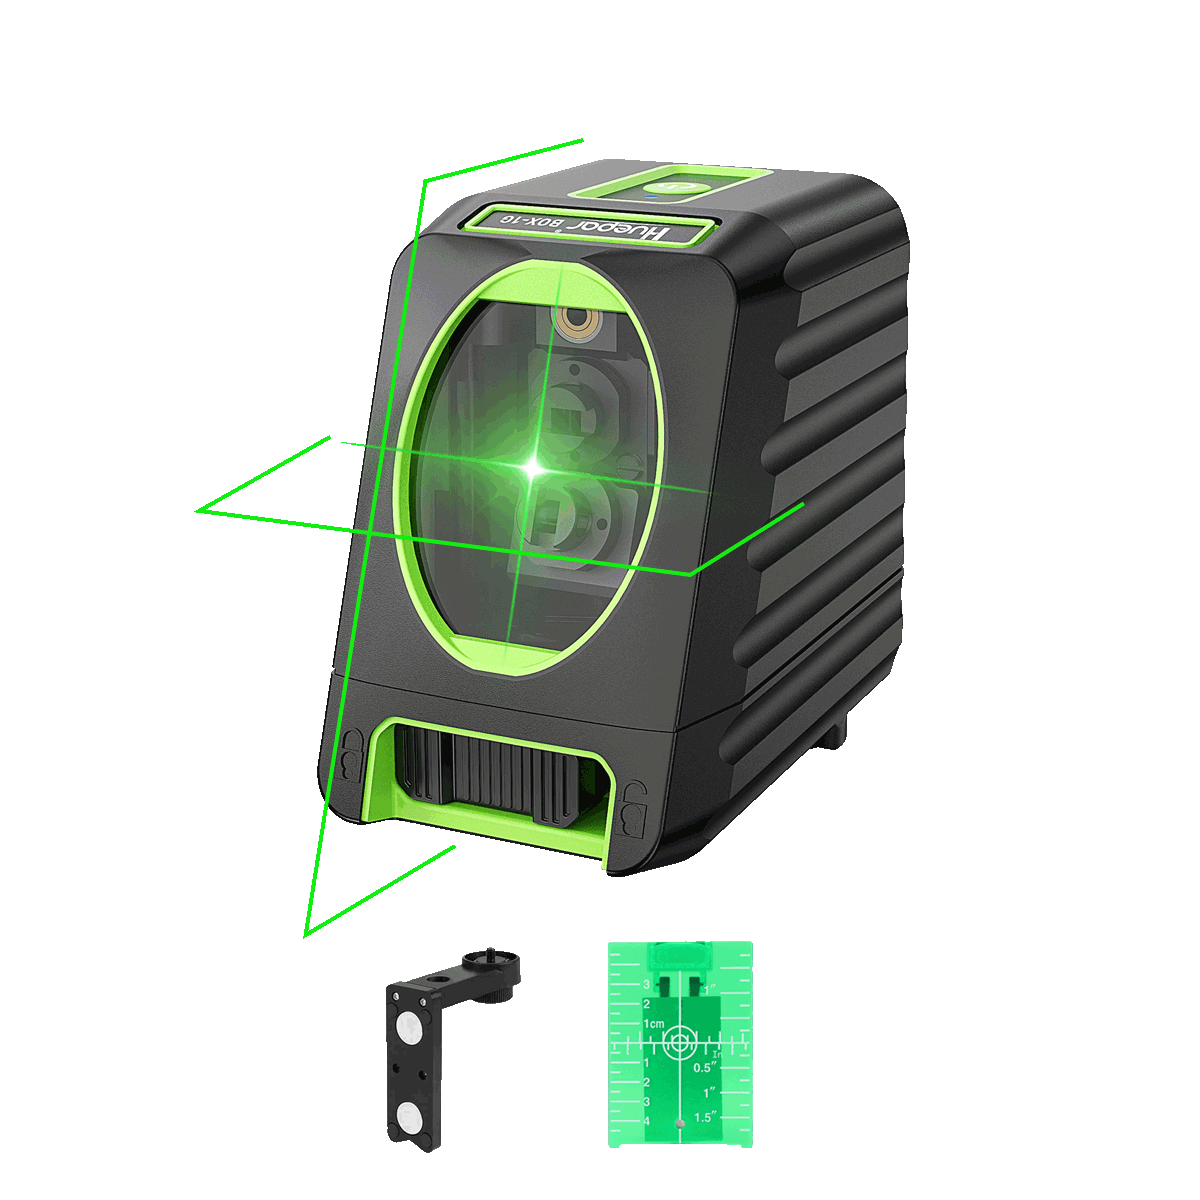
Line Laser Levels
Line laser levels project one or more lines of laser instead of dots. They're really designed to cast the laser beams horizontally, vertically, or as cross-lines, and are ideal for leveling cabinets, laying tiles, and making sure the absolute perpendicularity of walls. Lines provide a more general reference than dots.
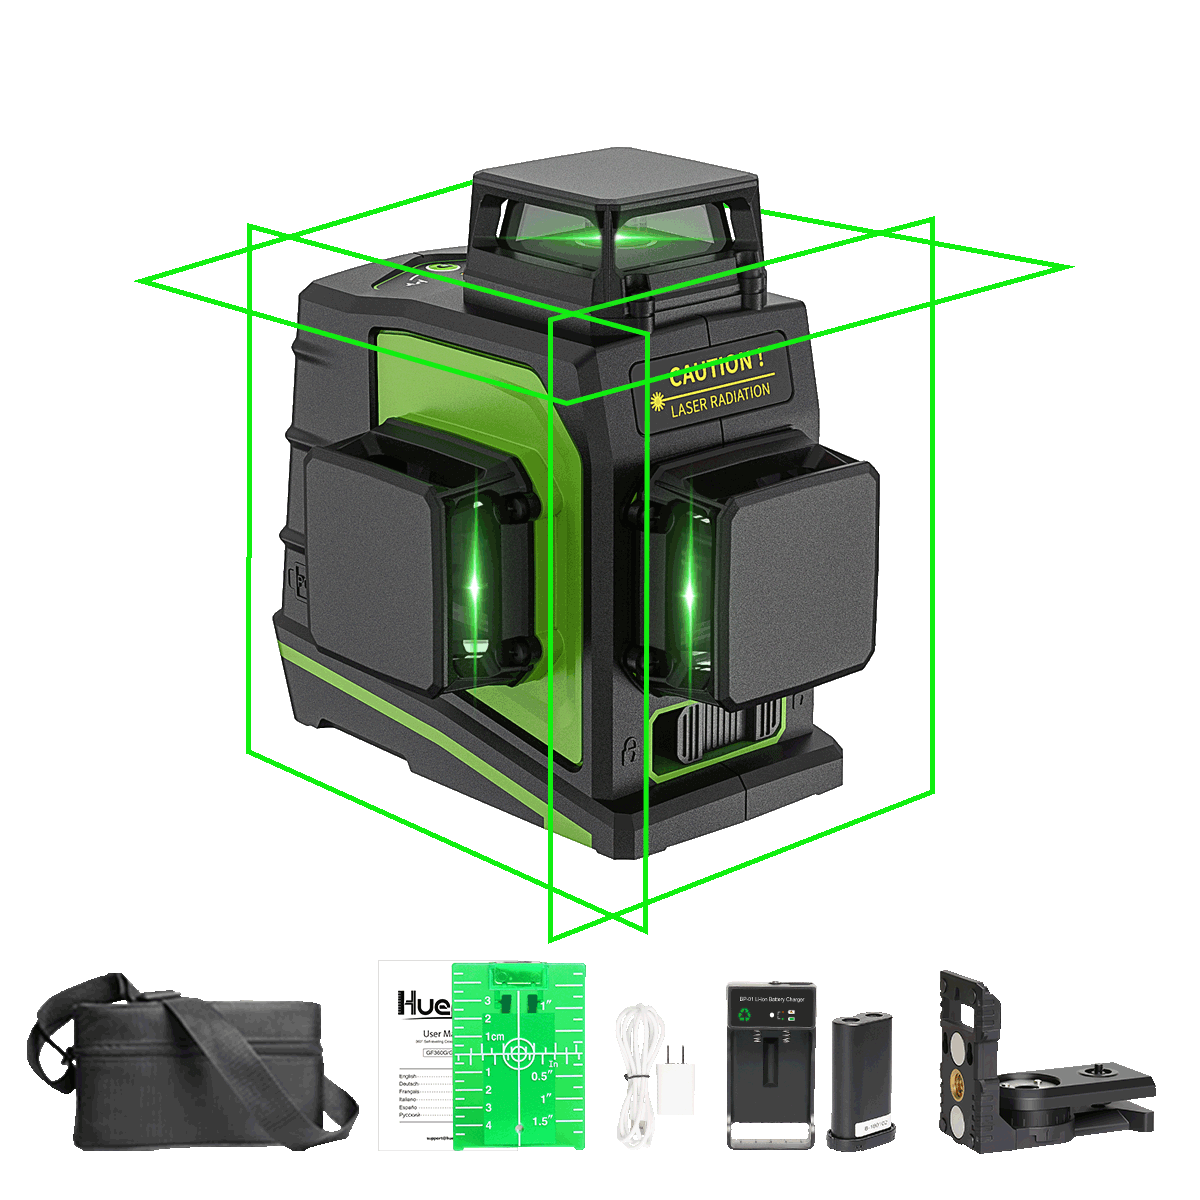
Combination Line and Dot Laser Levels
The name says it: they are combinations of line and dot lasers. These are lasers capable of projecting laser lines horizontally, vertically, or cross-lines, alongside plump dots. They are quite versatile for a plethora of different tasks involving leveling and alignment, hence they're favorites for many professional contractors and serious DIYers as well.
Features to Look For When Choosing a Laser level
When selecting a laser level, several key features should be considered to ensure you get the right tool for your needs:
Visibility: Laser levels typically come with either red or green beams. Red beams are more visible indoors and in low-light conditions, while green beams are easier to see outdoors and in bright sunlight.
Range: The range of a laser level is basically the maximum distance that the beam can project when it could still be reasonably visible and accurate. For most indoor projects, 30-50 feet should work, but for bigger projects or outdoor projects, you may go for those with ranges reaching up to more than 100 feet.
Accuracy: Accuracy is crucial for ensuring precise measurements and alignments. Most laser levels have an accuracy rating, typically expressed in inches per distance (e.g., ±1/8 inch at 30 feet). Higher-end models offer greater accuracy, which is essential for professional or demanding applications.
Battery Life: Look for laser levels with long-lasting battery life or the ability to use rechargeable batteries. This can save you from frequently replacing batteries, especially during extended use.
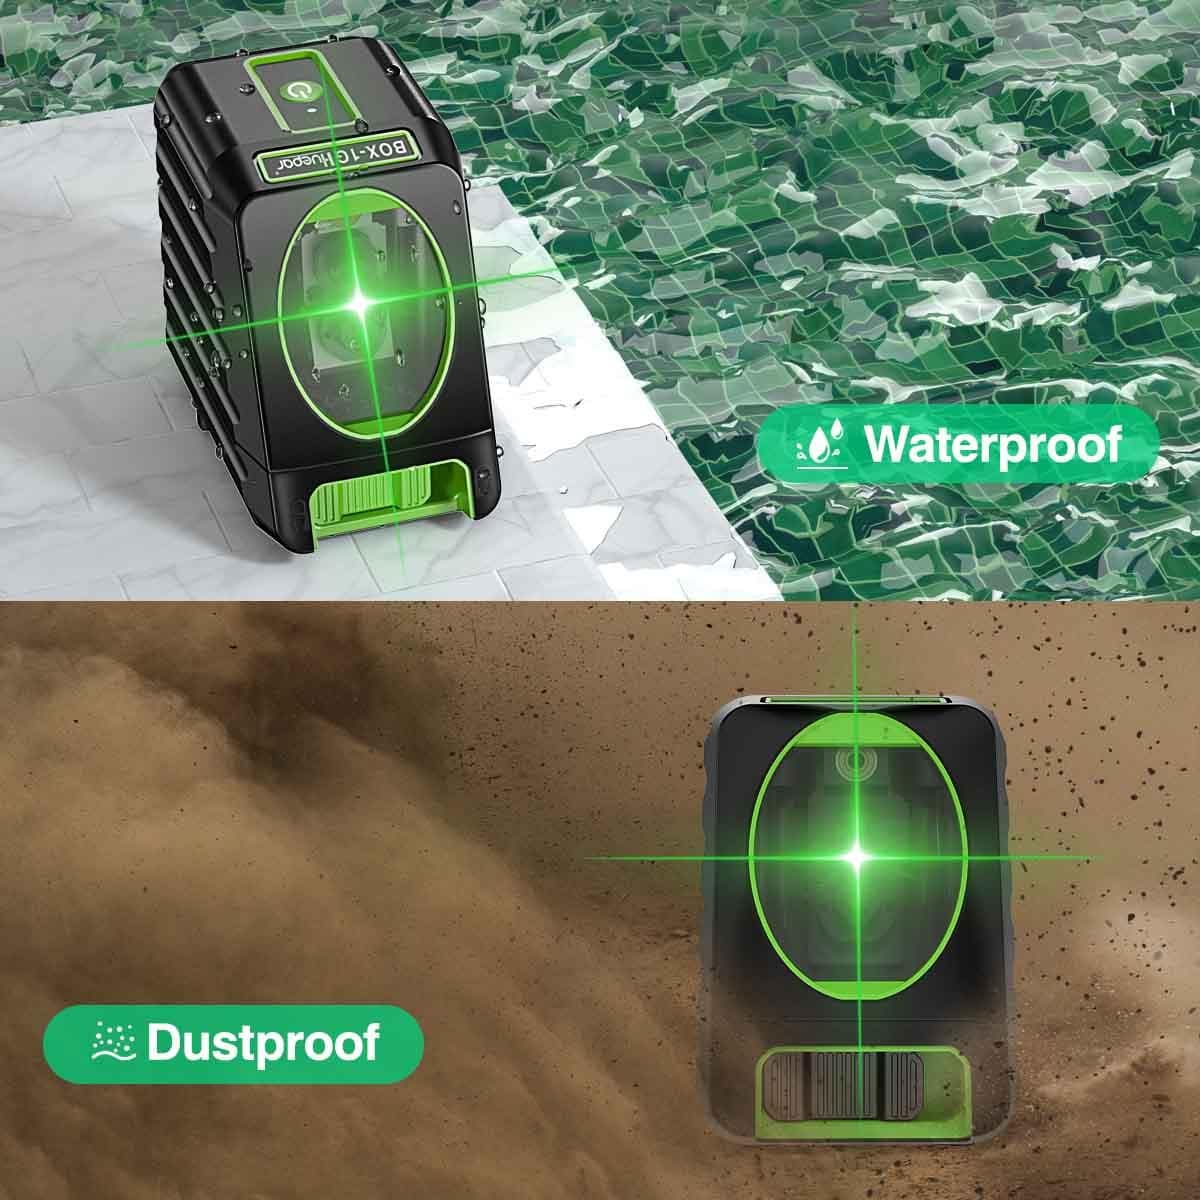
Durability: Laser levels are usually employed on hard job sites; therefore, a model should be selected that possesses a durable housing and can sustain drops and bumps or even basic exposure to dust and moisture. Most laser levels have their housings made from rubberized or metal materials for added durability.

Safety Precautions
Lasers used in laser levels concentrate light into very strong beams that may potentially damage the eyes in cases where one looks directly into them. Care must be taken never to look directly into the beam of a laser level-even for a split second. Many laser levels provide glasses that enable the beam to be more visible; these do not function as safety glasses. These types of glasses increase the contrast in order to see the beam better but do not offer protection from possible laser damage to the eyes. Never look into a laser beam, even with the given glasses. Always set the laser level so that it projects the beam outside of your line of sight and outside others' vision in the area.
Installing Ceiling Tiles/Panels
Laser levels provide a correct reference line to facilitate proper alignment while installing ceiling tiles or planks to avoid wavy walls or ceilings. Set one laser line a tile's width from the wall, and project a perpendicular line to test for square corners. You can then install the tiles or planks without gaps or uneven edges by following the laser lines rather than the possibly irregular walls. Set tiles in one quadrant at a time, installing them next to the vertical laser line and up to the horizontal line. This will ensure a smooth, professional-appearing installation, even when the framing or drywall in the room is less than perfect.
Hanging Doors and Windows
For hanging doors and windows, laser levels are extremely useful. For correct installation, it is important to check for plumb and level the jambs accurately. Here's how laser levels can assist in this process:
To check a door for plumb, set the laser level a couple of inches away from the jamb and project a vertical plumb line. Take a measurement from the jamb to the laser line at the top, middle, and bottom hinge locations. If the measurements are not the same, then the jamb is not plumb. To do so, place shims between the jamb and the wall stud until the distance from the jamb to the laser line is equal at all three points, making sure that it is perfectly plumb.
To align windows, take the same approach. Set the laser level close to the window opening and project a vertical line. Measure between the jamb and laser line multiple points up and down the jamb's height. Shim the jamb until the distances are consistent, which means the jamb is plumb.
A laser level provides a bright, visible line that allows quick identification and correction of any deviation from plumb, thereby assuring the proper operation of doors and windows and avoiding other long-term issues due to misalignment.
Setting Wall Tiles
Laser levels are absolutely indispensable when laying out and installing wall tiles. One perfectly level horizontal line and one plumb vertical line projected across the whole room provides instantly a very accurate tile layout grid. You will not need to continuously check level and plumb with a spirit level or plumb bob.
Set the laser to match your desired tile layout pattern. Starting in one corner of the room, use the intersection of the horizontal and vertical laser lines as your reference point. Lay out the first few tiles along the laser lines, making sure they're perfectly level and plumb.
Then, work quadrant by quadrant, laying tiles to the horizontal laser line and out along the vertical laser line. The cross-lines of the laser act as a constant guide to allow you to quickly and accurately set each successive row of tiles without continual level and plumb checks.
This quadrant method ensures your tile layout remains perfectly square as you work across the room. The laser lines prevent any gradual drifting or compounding of errors. When you reach an adjacent wall, the tiles will fit tightly without any unsightly lippages.
Accessories for Laser Levels
Laser level accessories help extend the functionality, range, and visibility of these useful tools. Some key accessories include:
Tripods: A tripod provides a stable, adjustable base for your laser level. This allows for precise positioning and eliminates wobbling that can occur when placing the level on an uneven surface. Tripods often have built-in bubble levels and allow for height adjustment.
Staff Rods: Also called grade rods, these vertical poles have leveling vials and marked increments. When combined with a laser detector, staff rods allow you to accurately measure site elevations over long distances for applications like grading and excavation.
Laser Detectors: These detectors provide the laser beam with both visual and audio indications so that locating the laser line/dot is effortlessly accomplished from long distances or where the beam could not be visibly perceived by the human eye. That, in effect, dramatically extends the working practical range of the laser level.
Magnetic Brackets: With these brackets, you will be able to mount your laser level easily on metal surfaces, such as steel beams or studs, for hands-free operation at a fixed position and height.
Colored Glasses: Some laser level kits include tinted glasses that enhance the visibility of the laser beam color (red or green) when working in very bright conditions.
The right accessories will help in utilizing the full potential of the laser level for layout, leveling, plumbing, and squaring on a job site or around the house.
Advantages Over Spirit Levels
Laser levels offer several advantages over traditional spirit levels:
-
Continuous Line Reference: Unlike the bubble vials that can show level only at one single point, laser levels project a continuous horizontal or vertical line across the entire room. You can, therefore, easily check the level and plumb across large distances with ease.
-
Visibility: The line of the laser is highly visible and cannot be obscured or covered up as in the cases of chalk lines or pencil marks. This is most useful when thinset, mastic, or drywall compound covers the material being worked upon.
-
Repositioning: With a laser, repositioning or adjusting lines can be quickly done without re-drawing a line or repositioning additional tools involved. The process saves time and energy in layout and installation jobs.
-
Accuracy Over Distance: While spirit levels become less accurate over longer distances, laser levels maintain their accuracy across an entire room or workspace.
-
Multiple Reference Points: Many laser levels can project horizontal, vertical, and even diagonal lines simultaneously, providing multiple reference points for various applications.
With their continuous line reference, high visibility, and ease of repositioning, laser levels streamline layout tasks and improve accuracy compared to traditional spirit levels.
Proper Setup and Use
Setting up and using laser levels properly ensures an accurate measurement for the best performance of these tools. Designed intrinsically to be self-leveling-that is, it adjusts and self-calibrates in such a way that a perfectly level or plumb reference line is set out-the need now is only to set this tool on stable surfaces or mounted safely to prevent it from moving or any interference when the device is at work.
Most laser levels come with mounting possibilities, like tripods, clamps, or magnetic brackets, which will allow you to set up the tool at a certain height and at the angle you need. For overhead works or when operating from a distance, it is advisable to use a tripod or mount this laser level on some stable surface for consistent and reliable results.
Be careful setting up the laser level to avoid obstruction or interference that might block or distort the laser beam. Reflective surfaces-mirrors, windows-can make the beam scatter or create confusing reflections, making following a reference line difficult or impossible.
It's also important to consider the environment and lighting conditions. While most red laser beams are more visible indoors, green lasers offer better visibility in bright outdoor settings or when working in direct sunlight.
Most laser levels self-level through the mechanism of a pendulum system, which, within a certain range-usually around 4 degrees-accounts for slight deviations from being level. If this tool is tilted beyond that, self-leveling would not be achieved, which one will vividly see when the apparent laser beam is distorted or flickers. This, in turn, will show him that some manual adjustment or repositioning is necessary.
Indoor vs Outdoor Use
Indoors, red laser levels are generally more visible and have enough range for most residential projects, such as hanging pictures or aligning cabinets and tiles. The brightness of the red laser can easily be overcome by direct sunlight when working outdoors.
Green lasers are designed for high visibility in bright outdoor conditions. The green beam is brighter to the human eye, thus easily spotted over longer distances outside. Many green lasers also have a pulse mode that allows them to be used with special laser detector accessories, further increasing the effective range.
Environmental factors such as dust, moisture, wide temperature variations, and construction-site debris can all potentially affect the performance and accuracy of a laser level. Most are designed with rugged housings to withstand typical construction environments. However, it's still important to handle them with care and keep the laser windows clean for best performance.
For outdoor use, look for models rated for specific IP (ingress protection) code ratings for better resistance to water, dust, and other contaminants. Some laser levels have special coatings or housing designs that handle freezing temperatures on winter jobsites better.
Therefore, a less expensive red laser level will suffice for general indoor residential uses. Once you need to work outdoors over greater distances, a green beam laser level with pulse mode will give you much better visibility and range capabilities.
Accuracy and Range
Laser levels are designed to provide accurate reference lines over a certain range. The accuracy and maximum usable range can vary depending on the specific model and price point.
Typical accuracy for mid-range laser levels is around ±1/8 inch per 30 feet for level/horizontal lines, and ±1/4 inch per 30 feet for plumb/vertical lines or dot modes. Higher-end models may offer increased accuracy up to ±1/16 inch per 30 feet or better.
Most residential laser levels are rated to go out up to 100 feet indoors with the line projected for level/horizontal and 50-65 feet for plumb/vertical lines or dots. Some models have a pulse mode, which allows for a broader working range, reaching up to 165 feet or more when used with a receiver. This would also be helpful in laying out decking or landscaping outdoors.
Accuracy and range specifications should be evaluated in light of your typical project needs. For most indoor applications, such as hanging cabinets, aligning tile, or mounting shelves, a mid-range model is fine with an accuracy of ±1/8 inch at 30 feet. For bigger projects or more precise outside work, the investment in higher accuracy and longer-range laser levels pays off.
Cost Considerations
The cost of laser levels varies widely: from simple models that cost about $30-$50 for the amateur homeowner to professional units that may upwards be over $300 or more. Accuracy, range, and features do a lot in defining the cost.
For most simple DIY tasks, such as hanging pictures, lining up tiles, or even putting in cabinets, a laser level costing in the range of $50-$100 will suffice. These are generally accurate to about 1/4 inch over 30 feet and visible out to 30-50 feet. They might project just one horizontal or vertical line or have cross-line capability.
Spending upwards of $100-$200 gets you increased accuracy, often 1/8 inch or better over 30 feet, longer range up to 100 feet, and more features, including pulse modes for use with detector accessories. These mid-range models are versatile for both DIY and light contractor work.
Professional tradespeople and contractors will want to invest in the top laser level models costing $200-$500+. At this premium price point, you get maximum accuracy down to 1/16 inch or better over long distances, durable housing for jobsite conditions, and advanced features like green beam visibility, self-leveling over a wider range of degrees, and remote control operation.
While laser levels require a higher upfront investment than a traditional spirit level or chalk line, the time savings, accuracy, and convenience they provide can quickly pay off - especially for frequent level/plumb applications. High-quality laser levels are a wise investment for serious DIYers or pros.
Top Laser Level Brand
Among the laser levels, there are a few well-known brands in the market. Here is one of the most popular manufacturers and model recommendations:
Huepar: Huepar is a more budget-friendly brand that offers reliable laser levels at an affordable price point. The Huepar 904DG Green Beam Cross Line Laser Level is a great value option with impressive accuracy and visibility.

Related Posts

How to Use a Laser Level for Kitchen Cabinets?

How to Use Self-Leveling Lasers?

How To Use a Laser Level Without Tripod?

How to Use a Grade Laser?

How to Use a Laser Level to Square a Room?

How to Use a Laser Level Outdoors?
